Streacom DB-4 Silent Kaby Lake Media PC Build: The Sound Of Silence
Slot in the motherboard so it rests on the two designated posts, then secure it with the two top thumbscrews.
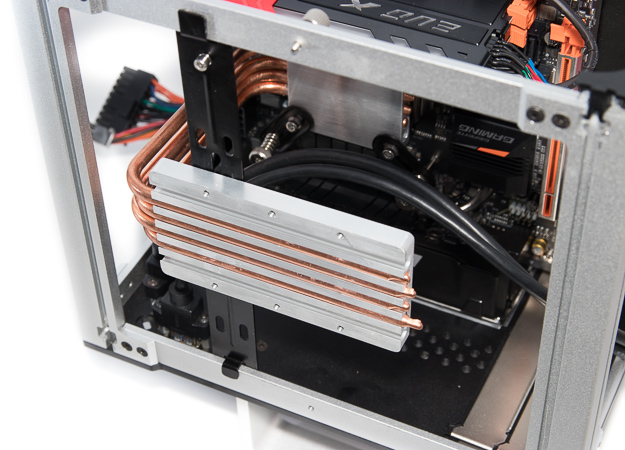
We will want to secure the CPU cooling block in place to prevent it from putting strain on the socket. Secure it with two of the included universal brackets and a few thumb screws. Its positioning can be adjusted up and down as needed to fit. Do not apply the thermal pad yet.
Now affix the 24-pin motherboard and 4-pin CPU cables, then secure the front panel I/O and USB 3.0 cables. If you have other internal drives, now is the time to run you SATA cables we well.
With the interior squared away, we can now place the side panels back on. Start with the case on its side and the CPU cooling block facing up. Position the thermal pad on it and stretch it slightly to cover as much surface area as possible. The thermal pad is not particularly sticky, but will be kept in place by pressure.
Carefully slot in the first panel on top of it, taking care to not displace the thermal pad.
Move the chassis back upright and reattach the rest of the panels.
Drop the lid back on top and secure it with the four hex screws.
Finally, invert the chassis and secure the WiFi antenna (if desired) as well as AC power and video cables, a mouse, and a keyboard.
The WiFi antenna can be run just about anywhere, but it is also just thin enough to run through a side panel vent and position on top for a neater look.
That’s all there is to it, we are ready to hook it up to a monitor or television and install the operating system.


