Design and Internals - Building Muscle Into A Compact Frame
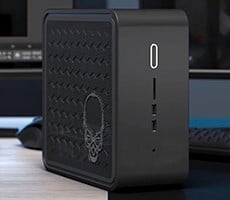
You have to love the size of the Gigabyte BRIX Pro, like its brethren, Intel's NUC, it quite literally fits in the palm of your hand. On the top there is a single backlit power button and on front you'll find a pair of USB 3.0 ports and a combo line-out audio jack for headphones or SPDIF output. There's also a large vent panel with a metal mesh screen on the right front corner of the device and though it's functional for mitigating thermal build-up, it's also a nice design cue as well.

The backside of the BRIX Pro is where all the action is and we'd have to say that GB hit all the major key feature requirements, with the exception of maybe an SD card slot, which would probably locate better on the front of the device.

Though SD cards aren't welcome in the design, you do get another two USB 3.0 ports (four total) for solid expansion and media access options, as well as an RJ45 Gig-E port, DisplayPort output and HDMI output. Back here is where the AC power adapter's barrel connector plugs in and you'll also find a Kensington security slot port. Does anyone ever use these anymore? They seem to be on most any PC device these days but I've never used one. Ever.


Once you remove the four screws that are recessed slightly behind four rubber grommets that act as skid bushings for the BRIX Pro, you can then remove the bottom cover of the machine and get access to its internals. As you'll note, there's a spare SATA power and data combo connector here that's available should you want to expand your storage to a 2.5-inch drive - and we'd recommend it be an SSD-only affair since both heat and mechanicals might be a challenge for a 2.5-inch HDD.


The SODIMM slots are easily accessible as well and you can upgrade to 16GB of DDR3-1600 memory, though our BRIX Pro came equipped with 8GB (2X4GB sticks). Pull one more screw and we can remove the Intel mSATA SSD that was installed in our machine and then get access to the combo 802.11ac WiFi and Bluetooth card that you see still installed in its slot. If you want to dig deeper still, just pull two more screws holding down the tiny BRIX Pro motherboard, then flex the front of the metal chassis out just a touch and lift from the rear of the motherboard (we pulled gently on a SODIMM socket) and you can then pull the entire CPU and motherboard assembly out. The front audio jack protrudes though the chassis just enough to hang it up but just flex the chassis out ever so slightly and it will clear the metal housing.


Densely-packed would be a gross understatement here. When you consider all this tiny PCB offers in terms of functionality, features and performance, it's hard to believe Gigabyte was able to pull it off in such an absolutely miniscule area. The all-copper heatsink sitting atop the Core i7-4770R CPU, is screwed into place through the motherboard and we didn't take the next step to try and remove it. On top of that heatsink is a blower fan that, when it spins up, can get pretty annoyingly loud. It has a big job to do to keep Intel's full integrated CPU and GPU engines cool, so it's no surprise. Again, more on this later. Let's button things back up and fire it up...


