Seagate BlackArmor NAS 440 NAS Device
The 440 comes with its installed drives preconfigured as a RAID 5 array, using all of the available storage space. In RAID 5 mode, the 4TB device has 2.68TB of available storage space. Since there are no drives to install or format, setting up the hardware is as simple as connecting the device to your local network, plugging in the power cable, and turning the device on. You still can't quite use the device yet as there is still some minimal software-based setup steps that must take place.
 |  |
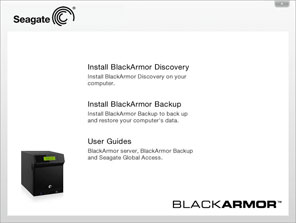
| Install options from the bundled CD. | BlackArmor Discovery application. |
The bundled CD includes both Windows and Mac version of the BlackArmor Discovery application. Once installed onto a system it automatically locates the 440 on the local network, lets you manage the device's settings by launching the device's browser-based BlackArmor Manager tool, and creates maps to existing folder shares. You don't have to install or even use the BlackArmor Discovery app in order to access the BlackArmor Manager tool, however; if you know the device's IP address, you can access the tool directly simply by navigating to the device's IP address in a browser.
 |  |
| Setup Wizard. | |
When you access the BlackArmor Manager tool for the first time, you must make a few settings with the Setup Wizard, such as creating a device name, assigning an administrator password, and setting up the IP address (either DHCP or static). Once this has been done, you can start using the device. By default, the 440 already has two shares (also known as folders) on the root of it single storage volume: Download and Public. Both of these folders are public shares, so any system or device that can see the 440 on the network has full read and write access to the folders and their subsequent subfolders. The Download share is meant to be the default location for files downloaded using the 440's built-in file download utility; and the Public share is meant to house all non-private files, such as music, photos, and videos that you intend to be accessible via the built-in DLNA or iTunes servers.
 |  |
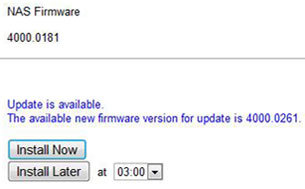
| Setup Wizard. | Updating the firmware. |
The next thing you'll likely want to do with the device is to see if there are any firmware updates available. In our case, our unit came with firmware version 4000.0181 installed, but version 4000.0261 was available. Updating the firmware was a fairly quick process, but it does involve rebooting the server. The 440 also includes some rather robust system backup features, so you'll also likely want to install the BlackArmor Backup utility on your local Windows client machines. Unfortunately, there is only a Windows version of the backup software, so Mac users are out of luck. (Some NAS devices include Mac Time Machine support, such as the Synology Disk Station DS409+ {with Disk Station version 2.2 installed}. The 440 does not have Time Machine support.) The 440 supports up to a total of 50 systems backing up or syncing their data via the BlackArmor Backup utility; however, it only ships with a 10-user license--if you want to add more users, you will need to purchase additional licenses.


