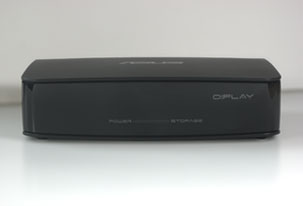
Asus O!Play HDP-R1 Digital Media Player

Setting up the O!Play


The O!Play comes with a remote control, a pair of AA batteries for the remote, a set of composite-video/stereo-audio cables, a printed Quick Start Guide, and CD that contains a more detailed user manual. The Quick Start Guide devotes only two pages to setting up the O!Play, but for most users this will be enough to get the device up and running; setting up the O!Play is fairly easy--at least as far as using it to play files from an attached storage source, such as a hard drive or USB flash drive. More detailed setup and usage details can be found in the user manual on the CD.


 Left: The front of the O!Play. Right: The O!Play and remote (the quarter is there for scale).


To get up and running, all it takes is plugging in the O!Play’s power connecter, attaching a USB storage source containing media files, and connecting the device to video and audio outputs. In our testing, we used a 320GB Seagate FreeAgent Go external hard drive and a handful of USB flash drives as our direct-connected USB media sources. Drives formatted with FAT32, NTSF and HFS (Mac OS), all worked flawlessly. It bears noting that the FeeAgent Go drive is a bus-powered, 5,400RPM drive, and we didn’t run into any stuttering or latency issues during media playback with the drive. The only issue we ran into with the O!Play’s connections--and it was a minor one at that--is that the combo eSATA/USB port is a bit snug, so you’re going to have to use a little elbow grease to attach any drives to this port.


 Left: The back ports of the O!Play. Right: The ports on the left side of the unit.


In order for the O!Play to also access media files over your local network, the device’s Ethernet port needs to be connected to your local network via a switch or router. The Ethernet port’s speed is limited to 100Mbps, but this connection appeared to be fast enough for all our test files, including a number of high-bandwidth video files. Asus has also announced an updated version of the O!Play--the Asus O!Play HDP-R3 (MSRP: $139.99)--which adds 802.11n wireless networking support.


 There are no ports on the right side of the unit.


We connected the O!Play to several HDMI-based displays, including a 1080i 42-inch Plasma TV and a 1080p 24-inch LCD monitor. As soon as the HDMI connection was made, we could play both video and audio on the displays without any additional necessary configuration. However, in order to make sure that the O!Play was working optimally, we went into the O!Play’s Setup utility to make sure that its settings met our needs.


Related content