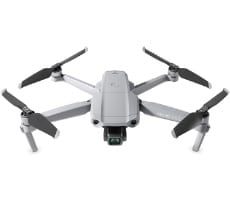
DJI Mavic 2 Zoom Review: An Eagle-Eyed Aerial Ace
As noted, the Mavic 2 is easy to fly, mainly because it's unhesitatingly responsive to controller inputs; it does exactly what it's told, when it's told, no more and no less. By the same token, it is spectacularly unresponsive to the wind. We flew in a fairly stiff breeze and the Mavic 2 Zoom barely moved, hanging almost motionless in the sky as if it were nailed there. Especially for a newbie, it's comforting to know that your aircraft will go exactly where you point it and will respond immediately to commands. But keep in mind that it's much like programming: the machine will do exactly what it's told, even when what you've told it is wrong.
Speaking of responsiveness, the manufacturer says to expect a latency of about 120ms, and I have to say that any lag was barely noticeable, at least at the distances I was flying. We suppose if you sent the aircraft out a couple of miles or more from the controller, you might notice some degradation in command response, but we weren't going to try that with a loaner drone. Under typical conditions and at normal distances, the Mavic 2 Zoom is flawless in flight and its reactions are crisp and precise.
The mechanics of flying the Mavic 2 are simple enough. Once you've confirmed that you have a good GPS fix and that your compass is correctly calibrated, you can take off in either of two ways: Use the auto-takeoff icon and slider, or else bring the two joysticks down and inward. In the former case, the props will spin and the aircraft will rise to hover at an altitude of 4 feet; in the latter, the props will spin up but the aircraft will remain on the ground until you ascend by pushing the left-hand stick forward. Important note: When flying, you can also STOP the motors at any time during the flight by pulling the two joysticks down and inward. This is not recommended except in extreme emergency, as this maneuver will cause the aircraft to plummet to earth. Generally speaking, "plummeting" is something you should avoid when flying a drone—or anything else.

And you're flying. It's that simple. Once airborne, wait a moment until the Aircraft Status Indicator (located near the middle at the top of the app's display) blinks green to indicate that the Home Point has been recorded; once that happens, you're free to fly.
In Mode 2 (the default mode, though you can switch among three different joystick modes), push the left stick forward to ascend, and pull it back to descend. Pull the left stick left to turn the aircraft to the left and right to turn it right; holding the stick to the left or right will cause the drone to turn in the appropriate direction around its vertical axis. The right stick controls your craft's ability to move forward and backward and toward the left or right.
As noted, it is possible to switch joystick modes, but do yourself a favor and wait until you're comfortable flying the aircraft. And if you accidentally switch modes while playing with settings, don't forget to switch back to your favored mode; if you don’t, the results will be, shall we say, disconcerting.
Again, this pretty much becomes second nature after a little practice. You soon learn to guide your craft without consciously thinking much about the actual mechanics. Which is a good thing, because while you're flinging this aircraft around, there are things going on onscreen that you need to pay attention to.

You'll most likely be flying in P (position) mode, at least at first. But you may eventually want to experiment with the other modes: S (sport) mode unleashes the beast, allowing your aircraft to reach its maximum speeds and altitude, while T (tripod) mode purposely slows things down, most often to afford the opportunity to capture flawlessly smooth video. Again, P mode is the one most people use most of the time, especially because it's the mode in which power, maneuverability, and safety (mainly in the form of obstacle-detection) are most evenly balanced. It's important to note that switching among the P/S/T modes has nothing to do with joystick configurations or with any of the special shooting modes buried deep in various submenus; that's a whole different set of options.
On the DJI Go 4 app's display screen, you'll be able to see a real-time feed of what the aircraft's camera sees; keep in mind that you can fly this thing backward, so what you're seeing out of the camera may not always be what's in front of your drone. The same real-time feed can be stored as a 1080p video (in either MOV or MP4 format) on either the controller's internal memory, an SD card inserted in the controller, or—if there's enough free space—on your mobile device itself.


