Maingear ZERO Gaming PC Review: The Cleanest Desktop PC Ever
| Maingear ZERO Legendary Boost Gaming PC: As Configured - $3,389 @ Maingear The culmination of over a decade of design, Maingear's ZERO moves critical connectors to the back of the motherboard, giving it the cleanest looks of any computer we've reviewed to date.
|
|||

|

 |
||
There's a pretty solid chance that the regular HotHardware readers among you will have built your own PC at some point or another. Most people agree that the worst part of the actual build process is the last: wiring everything up. All the connectors are scattered about on the front of the motherboard, and that's also where you'll find all of the slots for bulky expansion cards, memory modules and of course the giant cooling apparatus for the CPU.
Maingear came up with a solution for this problem way back in 2011. Maingear's CEO Wallace Santos filed a patent titled "Motherboard and Case with Hidden Internal Connectors." If you've followed our news coverage and read the headline to this review, you'll have already figured out how they hid the connectors -- by putting them on the back of the motherboard. This doesn't just look nicer, it also makes the machine way easier to assemble and maintain. Maingear calls it "MG-RC", for Maingear Rear Connections.
It's been a long road from the patent in 2011 until this release today, but it's impossible to deny the results. To put it simply, the Maingear ZERO is one of the best-looking machines that we've ever set eyes on. The best part, though, is that it fundamentally uses familiar components. Aside from the unique mainboard, there's nothing particularly peculiar or proprietary going on in this system, which means you can upgrade and repair it freely.
That's not to say that we have no nitpicks about this machine, but we'll get into those over the course of the review. First, let's take a look at the system's specifications:

You'll notice right at the top that this particular machine is named the "Maingear ZERO Legendary Boost." That's the name of the specific configuration that we have in for testing. Maingear offers no less than six base configurations for the ZERO, and five of those have a "Boost" option that doubles the memory and storage capacity, while also upgrading the Windows 11 install to the "Pro" version.
The most basic configuration of Maingear ZERO comes with a Core i5-14400F and a GeForce RTX 4060 for $1399, while the most beefy setup is the "Ultimate Boost" version with a Core i9-14900K (chip currently on sale at $545), 64GB of overclocked DDR5 memory, and a GeForce RTX 4090, all for a hefty $4269. What we have here isn't the highest-end configuration, but one step down; it trades the GeForce RTX 4090 for an RTX 4080 SUPER and drops down to an 850W power supply from the 1200W of the Ultimate, but otherwise the systems are identical.
Going over the particular specifications of our system, a few things stand out. We're happy to see hot-clocked 6000 MT/s DDR5 memory, but we'd have liked to have seen some with lower latency. That high memory latency does come into play in one of our benchmarks, which you'll see soon enough. We're very fond of the massive 4TB Cardea A440 Pro SSD, though, and of course we have no complaints about the choices of CPU or GPU either.
Maingear ZERO Gaming PC Inside And Out
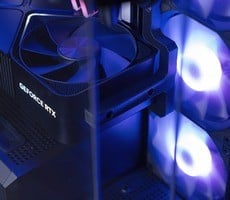
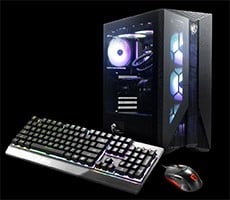
The chassis used here is the MSI MAG PANO M100 PZ (currently on Amazon at just $107) in black. This chassis also comes in white, but we prefer the blacked-out look for this system as it matches the similarly blacked-out aesthetic of NVIDIA's GeForce RTX 4080 SUPER. Without the RGB LEDs turned on, the system has a cool black-and-white aesthetic accented by the silvery details on the motherboard, and with the RGB LEDs turned on, it's a beautiful light show.

There really aren't any surprises here—positive or negative—except perhaps the presence of four USB 2.0 ports. We might have preferred that a couple of these were at least USB 3.0 (5 Gbps) ports, but you need somewhere to plug in peripherals, and it's nice to not have to "waste" a high-speed USB port on that, so we can't even really complain. On the contrary, we're actually quite happy to see the continued presence of 7.1-channel analog audio outputs as well as a TOSlink optical connection.
To get into the chassis, you simply unscrew the two thumbscrews at the top rear of the system (left of the above picture) and gently pull back on the handle there. That will release the plastic cover on top of the machine, which you can pull away revealing the 360-mm Maingear EPIC radiator.
This view lets you see the top of the system, which has slots for mounting 140-mm fans in place of the 120-mm-wide radiator that's there. You could theoretically mount a 420-mm radiator here, but you'd need a motherboard without much in the way of VRM heatsinks, and MSI doesn't recommend that configuration, anyway.
From this angle, you can also see the small tabs to the rear of the system that you use to remove the side panels. Once you've pulled off the top cover that secures the sides to the system, a firm tug on those little metal tabs will pop off each side of the case, no unscrewing required. Let's have a look at what is surely a nasty rat's nest of wires behind the motherboard.
In fact, it's not a rat's nest at all, but rather one of the most carefully laid-out cabling arrangements we've ever seen. As a system builder for more than twenty years, I got a bit misty-eyed looking at this machine laid bare this way. It's so elegant—all the ports are right there on the back. No more scraping your hand by sharp heatsinks or bulky graphics cards; no more flexing motherboards as you attempt to drive in 24-pin ATX connectors. It's beautiful.
From here, we can see mounting points for 2.5" SSDs and 3.5" HDDs behind the motherboard. Our system didn't include any of these, but there's both room and cabling provided if you decide to swap in some SATA storage. By the way, those fans are reverse-bladed; they're intake, not exhaust. Let's take a closer look at all this.
That 3D-printed bracket holding the GPU in place is quite secure, and we're happy to have it, but it is the source of a complaint we have with the ZERO. That bracket is actually a pain to remove. The screws aren't easily removed from those fans—attempting to unscrew them does nothing—meaning you have to unscrew the bracket from the graphics card if you want to remove it.
Since the front of the case is immobile glass, this means you're going to have to get a tiny little screwdriver in there to remove those two screws from the GPU cooler. With that done, you can finally lift the GPU out of the system to access the motherboard's second M.2 socket. It's a pretty small complaint in the grand scheme of things, but we would like it if the GPU sag bracket were easier to remove.
Now, you might be worried that a system with glass on both the front and side panels would suffer for cooling. We can spoil it for you now and explain that the seven fans in the system do their job just fine, but you don't have to take our word for it. Head over to the next page where we'll put the ZERO through its paces.


