HP MediaSmart Server LX195 Review


Initial Setup


Before you can start using the HP MediaSmart Server LX195, it needs to first be configured via a Windows-based system on your home network. As soon as you insert the software installation disc in your system, a Web browser page opens with some guidelines to follow to get the server properly set up. Inserting the disc also launches the Windows Home Server Connector Setup routine, which tries to find the server on your network and download the installation software from the server to your system. This is where we ran into our first problem; while the Windows Home Server Connector Setup routine found the server, it couldn't download the required software and therefore we couldn't get the server up and running.


 Our home network's non-standard DNS
settings caused problems during installation.

 Once we resolved the DNS issues,
installation went smoothly.


It turns out that because we used OpenDNS's DNS instead of the default DNS provided by our ISP, the install routine couldn't resolve the internal IP address of the server. As soon as we switched our network's DNS settings back to that from our ISP, the problem went away. While this issue is not likely to pop up with most installations, it should serve as an example that non-standard network set-ups can impact the effectiveness of some network devices and applications.


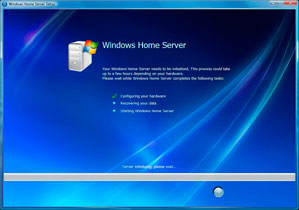
 Setting up the LX195 for the first time.

 Giving a network name to the LX195.


 Downloading updates.

 Installing updates.


With that momentary problem out of the way, the rest of the installation went smooth. The installation process requires that you give the server a name; setup an Admin password; and decide whether to enable automatic downloads and Windows Error Reporting, and participate in Microsoft’s Customer Experience Improvement Program. Part of the installation routine downloads and installs any available Microsoft updates.


 Installation finished and ready for action...

 ...But only after more updates are installed.


Even though a screen then informed us that the server was ready to use, this was not exactly the case. As soon as we logged into the server the first time, the HP MediaSmart software update routine kicked in and walked us through installing additional updates. HP adds a number of additional features on top of those that are built-into the Windows Home Server OS.


It was only after the HP updates were installed and the server rebooted, that we were finally able to start using the server. The reason why the server must be first setup on a Windows system has to do with how the LX195's configuration settings are accessed. In order to administer the server, you have to use the Windows Home Server Console, which is a Windows Remote Desktop Protocol (RPD) application--essentially whenever you access the server's user interface, you are actually doing so via a remote connection.


 Windows Home Server Console
login screen.

 Windows Home Server Console
Welcome screen.


The install routine also placed shortcuts on the system's desktop for Shared Folders on Server and HP MediaSmart Server. The Shared Folders on Server shortcut does exactly what its name indicates; it opens up a window providing access to all of the server's shared folders. The second shortcut opens up a Control Center window that provides a number of options for ways to access the server (see the screenshot above); we'll get into what the features are and what they do shortly.

Once the Windows Home Server Console software is installed on the first system, you do not necessarily have to install it on any more systems. However, there are some features that will only be available to systems that have the software installed, such as automated backups and the Media Collector feature.


 Windows desktop Control Center.

 Mac desktop Control Center.


Mac system backing up to the LX195 with Time Machine.


There is even a Mac version of the client software, which when installed on a Mac running Leopard (OS X 10.5), can use the LX195 as a networked Time Machine backup--the only other product that supports Time Machine backups over a network connection is Apple's own Time Capsule NAS device (albeit, it is fairly easy to implement a hack in the Mac OS X 10.5 OS to enable Time Machine support to virtually any NAS device, but this is an unsupported feature).


Accessing the Windows Home Server Console with Windows 7 RC,
running as a virtual machine in VMWare Fusion on a Mac.


You cannot administer the LX195 from the Mac OS, because the Mac OS cannot run the Windows Home Server Console. You could, however, access the Windows Home Server Console from a Mac that is running Windows either in a Boot Camp partition or as a virtual machine. In fact, we successfully ran the Windows Home Server Console on a Windows 7 RC (x32) virtual machine running in VMWare Fusion on a Mac. All the server's features worked flawlessly with this Windows 7 install.


Related content