Exploring NVIDIA's GeForce Experience 3.0, A Beginner's Guide
GeForce Experience has been around for a while, but it was recently redesigned with a cleaner, more comprehensive user interface that brings to bear a host of new features. The latest iteration also launches faster than before, and requires half the system memory than previous versions, making it easier than ever to use and less-taxing on system resources as well.
If you have an NVIDIA GeForce GTX graphics card, you might think keeping things light and just installing drivers is the way to go. However, GFE is a great tool for unlocking the full potential of your GPU.
To get it installed, skip over to the GeForce.com website and download GeForce Experience 3.0 -- keep in mind, it may already be installed on you system though, since it's also included in recent driver packs. If you do install it separately, double-click on the download to launch the installer and follow the onscreen instructions. At the end, you'll be prompted to make a new account, sign in via an existing NVIDIA account, or through Google or Facebook.
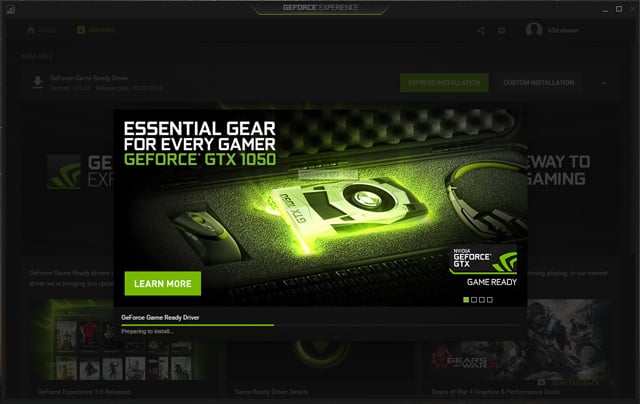
Once installed, if an update is available for the app or your GeForce drivers, you will be taken to the “Drivers” section of GeForce Experience where you can learn about newly supported games and the new or optimized features available in the update. Click the “Download” button and again follow the onscreen instructions. You can either select “Express Installation” and let GFE 3.0 handle it all, or you can choose a “Custom Installation” where you can manually choose which drivers and tools will be installed in addition to the GPU driver, such as drivers for PhysX, HD Audio, and more.
Once updated, GFE 3.0 will attempt to locate any games installed on your system and will list them all on the “Home” section of the utility. You can also tell the utility which folders to look through, if it fails to automatically locate all of your installed games.


