PC BIOS Guide: How To Safely Flash Your Firmware & 3 Key Settings To Check

So yes, let’s get the nerdy pedantry out of the way: we all still call it the BIOS, but what your motherboard is actually running these days is called UEFI (Unified Extensible Firmware Interface). It’s kinda like how we still say we’re going to “tape” a show or "hang up" the phone—we know it’s not literal, but we’ve all collectively decided to just roll with it. So when we say “BIOS update,” we mean "UEFI firmware update", at least on modern systems.
Now, why would you even want to flash your firmware? Most commonly, it's to improve the functionality of your system. Once upon a time, it was the case that you would never flash a new firmware unless you absolutely needed to. Now, CPU and motherboard vendors are making regular improvements to their firmware that can have a real positive effect on your PC-using experience, so it's a good idea to try and keep current—to say nothing of the potential security benefits.
Whatever the reason you're flashing your firmware, the process isn’t hard, but it can go sideways if you aren’t careful. Here’s how to do it right—plus three settings you should always double-check afterward, and three ways to avoid turning your motherboard into an expensive coaster.

Step-by-Step: How To Safely Flash Your Firmware
1. Find the right firmware. Visit your PC vendor or motherboard maker’s official support page—often easily found by Googling the model of the motherboard or PC—and triple-check the model and revision. Motherboards often have confusingly similar names with tiny differences (e.g., "B450M Pro4" vs "B450M Pro4 R2.0"). Get the right one, and don’t guess. Guessing bricks boards.
2. Download and extract. The firmware usually comes in a ZIP file. Extract it, and triple-check that you've got the right file. If you've got a pre-built PC and you're lucky, it may be the case that the BIOS update comes in a self-extracting archive that installs for you, automagically. If you're not so lucky, continue on.
3. Grab a USB drive or SD card. Make sure you don't have anything on the drive you want, right-click it in File Explorer, and hit Format. Make sure to pick FAT32 as the file system, and then slap the extracted firmware file on there. Keep in mind this will nuke everything on the drive, so seriously, clear it off first.
4. Enter the BIOS (UEFI). Most of the time, you can do this by mashing DEL or F2 at boot. Alternatively, hold Shift while clicking "Restart" in Windows, and then click Troubleshoot, Advanced Options, UEFI Firmware Settings. The machine will boot into the UEFI setup.
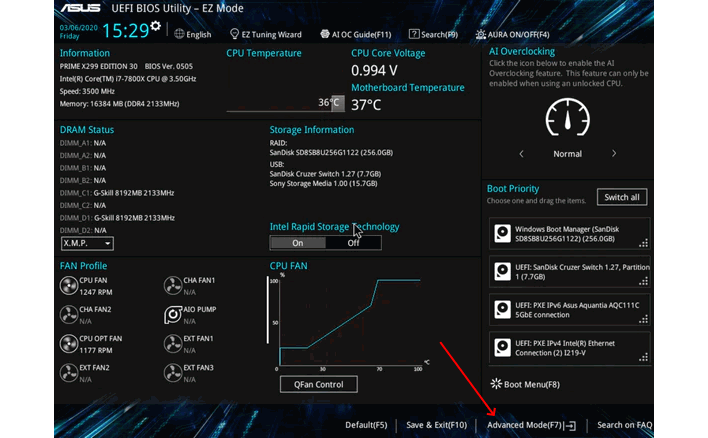
5. Find the flash utility. Virtually all modern PCs will have a utility built into the firmware specifically for updating the firmware. It'll be called something like EZ Flash, M-Flash, Q-Flash, etc, depending on the brand of your PC or motherboard.
6. Flash and wait. Select the file you put on the USB drive and then let the flash utility do its thing. Don’t touch anything. Don’t power off. Don’t bump the desk. Don’t sneeze.

3 Crucial BIOS Settings to Check Post-Update
Firmware updates almost always reset your BIOS settings to default, so you’ll want to check these:1. CSM (Compatibility Support Module)
If your system was booting in UEFI mode before, double-check that CSM is disabled. Legacy CSM is for old OS installs or weird boot media. Leaving it on when you don’t need it can mess with GPU initialization and cause all kinds of other weirdness. It also locks you out of Resizable BAR support, which dings your 3D game performance somewhere between slightly (NVIDIA) and seriously (Intel Arc). If CSM was enabled, you'll want to make sure to disable it, and then double-check that Resizable BAR is enabled.
2. XMP / EXPO Profiles
If you paid extra for fast RAM, make sure you're actually using it. Intel calls it XMP; AMD calls it EXPO. Either way, it’s usually off by default and needs to be re-enabled after a flash. Otherwise, your fancy DDR5-6000 kit is gonna sit there running at 4800 like a chump. Keep in mind that this is technically overclocking, and some boards may call it something odd (like ASUS' DOCP). Just enable Profile 1 and reboot. Keep in mind that that first boot after changing memory settings may take a long time (as much as a minute) as the system has to perform memory training all over again.
3. Boot Device Order
Sometimes a BIOS update changes or resets your boot order. If your OS doesn’t load, don’t panic—just go back in and manually set your boot drive to the top priority again. It happens more often than it should.
3 Common BIOS Flash Gotchas to Avoid
1. Wrong firmware = big sad
Even boards with nearly identical names can have totally different firmware. Most likely, the flash utility will check the firmware image for the correct board identifier, and if it doesn't find it, it simply won't let you flash it. However, that's not always the case, and flashing the wrong one can hard-brick your board, turning it into a very inconvenient dinner plate. Double-check the exact model and revision—then check again. Yes, this is worth repeating.
2. No UPS? No update for you.
If your power flickers mid-flash, you’re probably screwed. The firmware update is re-writing data on a chip that is required to boot your system. If that data gets corrupted, your system becomes unbootable. Use a UPS (uninterruptible power supply), or at least wait until there’s no lightning storm outside. Some boards have dual BIOS chips or recovery modes, but it's best not to rely on features like that unless you have to.
3. Your settings will reset to defaults
We said it above, but we’ll say it again: firmware updates reset everything. Fan curves, boot priority, RAM settings—it’s all going back to factory. Make note of your settings before the update if you want a smooth return to service. Some boards will let you save your settings as a profile—but not every board is able to load profiles across BIOS revisions, so it's best to manually note down any important settings changes.
Despite all the scary warnings above, BIOS flashing isn't something to be afraid of. It really is true that you can brick your motherboard, but what's a lot more likely is that the update goes off without a hitch, and you get to enjoy the new features, improved stability, or upgraded security of the new version. Let us know in the comments if you have any questions, concerns, or curiosities.
