AMD A85X Mobo Roundup: ASRock, Gigabyte, Asus

Asus F2A85-V Pro UEFI
The Asus F2A85-V Pro uses the same UEFI as other mainstream Asus boards, with its Basic and Advanced modes. Most people who bother to go into the BIOS at all will spend their time in Advanced mode. The AI Overclock Tuner delivers serviceable overclocks with little effort, and for those who are even lazier, the OC Tuner got our A10-5800K up to 4.4GHz easily. The Asus' UEFI isn't fancy, but it gets the job done and doesn't show lag. We'd say it's the best of the three UEFIs in this roundup.
Gigabyte F2A85X-UP4 UEFI
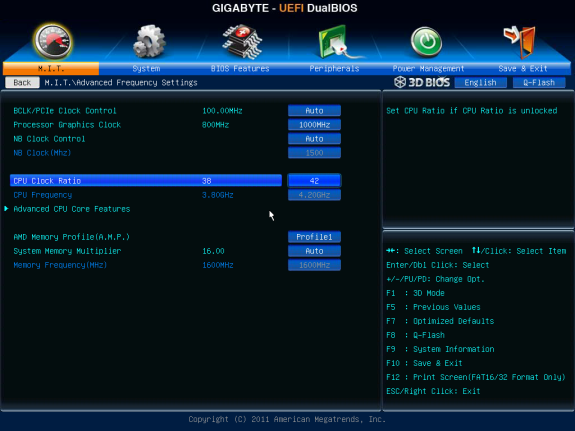
The Gigabyte UEFI isn't too different from the Asus one, though we did notice a lot more mouse lag. The mouse was never not laggy. As with the Asus, overclocking is easy; simple multiplier changes can be done just by typing in the multiplier, and more advanced options like bus speed and voltages can be accessed easily. The UEFI includes Gigabyte's 3D Bios, which is a cute way to quickly find board settings by clicking on a picture of that part of the mobo, but we didn't spend much time with it, preferring the normal UEFI.
ASRock FM2A85X Extreme4-M UEFI
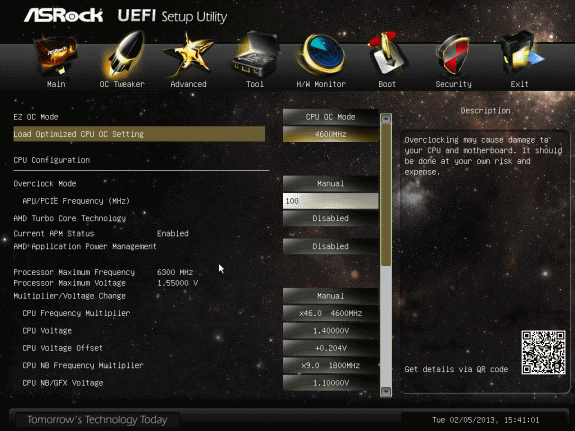
ASRock's UEFI is certainly the flashiest of the three in this roundup. You can't tell from the screenshot, but those stars in the background actually twinkle and sparkle. Adorable, right? That QR code in the corner with the legend "Get details via QR code" actually just links to a PDF of the manual, which is neat but not as neat as actually giving you details of what you're looking at. The overclocking menu for the CPU is excellent though with menus full of designated increments, rather than full edit control, and no indication of which voltages and clocks are the default. This leaves you scrolling through menus full of outrageous and possibly dangerous configuration options. Fortunately, you'll only need these manual controls if you want to go over 4.6GHz on the CPU, because of the excellent (and stable) preset overclocks. The choices for GPU overclock restrict you to Auto or preset speed settings from 400MHz to a boggling 1900MHz--twice as fast as stock. But, as we're sure you realize, just because there's an option listed doesn't mean it'll actually work.
|
As noted in the Overclocking Desktop Trinity section of our Virgo platform review, the A10-5800K is a bit finicky, and overclocking potential of course varies on a per-chip basis. We used the same APU for all three boards but we saw slight variations on each board. We ran all of these overclocks with a Cooler Master Hyper 212 Evo cooler in an open-air chassis and didn't mess with stock voltages except by letting the auto-overclock features of each board do their thing.
As mentioned above, on the Asus board we got the CPU cores to a stable 4.4GHz just by using the auto-overclocker. The auto-overclock won't touch GPU speeds, but cranking ours up from the stock 800MHz to 1013MHz was as easy as selecting that speed from a drop-down menu. We did not have to adjust the GPU voltages. The Gigabyte board, on the other hand, could only sustain a 4.3GHz CPU multiplier overclock and a 1000MHz GPU clock, bluescreening consistently at 44x. The ASRock board was yet another beast, with great CPU overclocks but terrible GPU overclocks at stock voltage. Because the ASRock's CPU OC presets include voltage adjustments, it’s easy to get a stable overclock. The 4.6GHz preset was easy and stable on the A10-5800K. Overclocking the GPU was harder--anything over “Auto” (the default 800MHz) on the Asrock board caused PCMark 7 to freeze during the GPU portions of its benchmarks. One annoying feature of the Asrock board’s UEFI: There’s no indication of “stock” clocks or voltages for the GFX Engine Voltage. There’s Auto, then a range of presets. This makes it difficult, for example, to set the graphics voltage to “stock” and slowly increase until the system is stable.
That said, each board has many overclocking options and fine control options, so patient overclockers should see higher stable overclocks with a little bit of work.


