Adding Joystick Input To The Raspberry Pi Pico Is The Retro Gaming Project You Need

A joystick controller is versatile and has numerous applications. Using a breadboard, some LEDs, and a Raspberry Pi Pico, user STEAM_guy93 on Reddit has put together a little tutorial and source code for building a simple joystick. Based on the scale of this little device you could probably combine it with a small screen, a 3D printed case and use it for your own little portable emulation station, you know, like the QT-Py PINKY for DOOM.
What you need for the example project is as follows:
- Raspberry pi pico with soldered pins (Get it from Amazon)
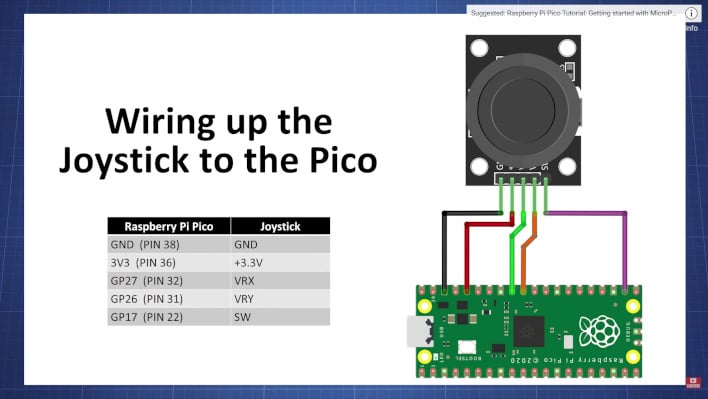
- 5-pin joystick (Get it from Amazon)
- LEDs (Get it from Amazon)
- 330ohm to 1kohm resistors (Get it from Amazon)
- a breadboard, and jumper wires (Get it from Amazon)
Not only has the Redditor posted up information and guidance on the public forum, but he has also put together a nice little video tutorial. It takes the user through his source code, written in MicroPython and much of the assembly process. The complete source code for the project was made available via Github as well. The open-source nature of this all makes it pretty easy to follow and simple to expand upon. Additionally, because of the low power nature of the hardware involved, you could do something like set up a 4-player arcade stick or cabinet system using the right equipment. Check out the full video tutorial below...
Another great thing about this project is that it is relatively inexpensive. The Pi-Pico is the most expensive part at a whole $15. Due to the availability of the source code and the relatively simplicity of the setup, we even think this could be a great thing for budding engineers, like the ones that might partake in the Google Chromebook repair program at their schools, for example.