Armored Core VI: Fires Of Rubicon, How To Pilot Your First Mech To Victory

Actually, the game opens with a tutorial mission that does a decent job of explaining the basic controls, but it does very little to explain Armored Core VI's systems and mechanics. It also ends with an out-of-nowhere gigantic helicopter boss that is both mobile and deadly. It's a wake-up call to new and old players alike—this is a FromSoftware game, after all, and opening with a surprisingly-tough boss is almost a staple now.
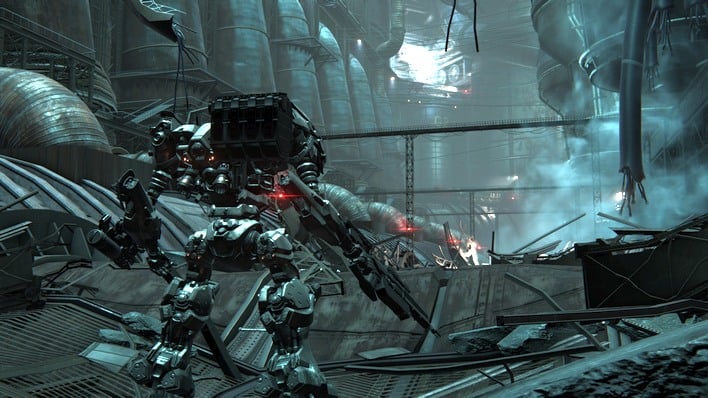
The game's first mission is called Illegal Entry, and it opens with you, the mostly-nameless Armored Core pilot simply numbered C4-621, being launched down to the planet of Rubicon 3 from space. After landing, you have to make your way to a small city where you're seeking a wrecked AC with a still-valid mercenary registration.
You see, you and your handler Walter are entering the battlefield illegally, without authorization from any entity. The goal of this first mission is to locate an identity you can assume so that the planetary authority doesn't come down on you, and so that you can get contracts and support through the ALLMIND mercenary agency.

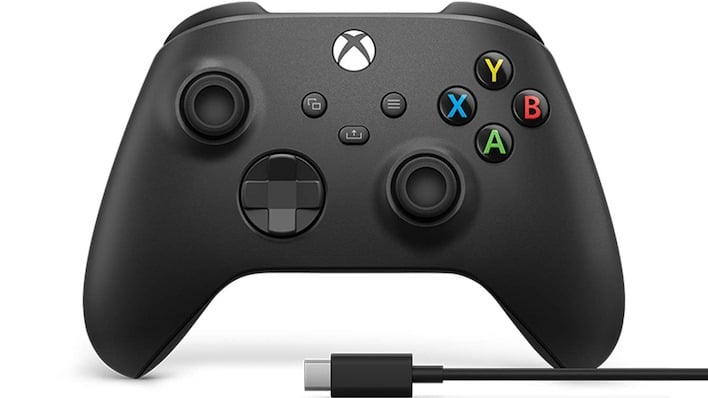
Before we go any further, I should stop to clarify that all references to controls will be on an Xbox-style gamepad. If you're playing on PlayStation, you're probably used to converting the controls in your head, and if you're playing on Xbox, well, no problem.
PC gamers, you can absolutely play Armored Core VI: Fires of Rubicon on a keyboard and mouse setup, and the title even supports full control rebinding. However, it's the opinion of the author that this puts you at a disadvantage, as your movement becomes significantly clumsier without the full 360-degree range of an analog stick. Using a pad also lets you divide the many inputs required by Armored Core VI across both hands instead of concentrating most of the controls on your left (movement) hand.
Quick movement is critical in this game, and unless you are comfortable binding and using at least six different functions on your mouse—not including aiming—we definitely recommend playing with a gamepad. If you somehow find yourself without one, here's a few recommendations that we have personal experience with:
- This generic Xbox 360 pad works well on Windows and is a great value at $18.99.
- Microsoft's official Xbox Core pad is $49.99, and might last longer.
- 8Bitdo's Ultimate Bluetooth controller has Hall-effect joysticks and Nintendo Switch support. It's $69.99.
Learning The Rules, Or, How To "Git Gud"
With that out of the way, let's talk about the mechanics a little bit. The game will explain to you about moving, boosting, jumping, and attacking. It'll also show you the controls for interacting with objects in the world, and teach you about assault boosting. It doesn't go into much detail about exactly how all of this interacts with the various meters on screen.Besides the AP meter on the bottom left—that's your "health", as it were—the two most important meters are the ones right in the bottom center.

The top meter, empty in the above screenshot, is your ACS meter. This is a measure of your Armored Core's ability to stabilize itself and continue moving freely. You can think of it sort-of like the posture meter in Sekiro: Shadows Die Twice. Different attacks inflict different amounts of ACS stagger—called "Impact" by the game—and if this gauge fills, you will not only be left unable to move briefly, but you will also take drastically-increased damage while in this "ACS Overload" state.
Right below the ACS meter is your energy gauge—full in the above screenshot. Once again, you can think of the energy gauge sort-of like the stamina bar in a "Souls" game, but it's really pretty different. Energy is not consumed by most attacks, for example. Instead, energy is consumed mostly by boosting, and as long as you're on the ground, it normally recovers extremely quickly (although this depends on your AC assembly.)

Watching the red crosshair in the center of the targeting reticle is critical. That's because it will show you where your attack will actually land. Your AC's fire control system (FCS) will attempt to target enemies directly, but if you're moving quickly, they're moving quickly, and especially if you're not facing them, or if your ACS isn't tuned for the range that you're at, it may struggle with getting shots on target. If the reticle turns white, you're not inside your weapon's optimal range.

As you advance through the first mission, take your time to practice with the controls. There are timed missions in the game, but completion time doesn't matter at all on your first run of most missions, so you can take your time and explore and play it safe. The starter Core is actually a pretty solid loadout, as it usually is.
Your right arm weapon is a rifle with mediocre damage and impact, but decent range and rate of fire as well as a huge amount of reserve ammo. It supports auto fire, so you can simply hold the right trigger down to keep shooting. Most AC pilots will spurn this kind of weapon because it doesn't have great DPS, but for some kinds of missions where you're fighting a lot of smaller enemies, its staying power can really be useful. You can manually reload the rifle after engagements by holding down the Y button and pressing RT; this doesn't waste ammo, by the way.

Note the yellow quarter-circles and the numbers next to them. Those indicate missile locks.
On your right shoulder, you have a four-lock missile pack. This is a basic rack of seeking missiles that always fires four at once. If you simply click the button, you'll fire all four missiles at one target, but if you hold down RB, your FCS will attempt to fire at least one missile at up to four separate targets. The missiles do more damage individually than one shot of your rifle, so landing all four missiles on a target is quite potent, but arguably the better use for it is to make use of multi-lock to rapidly clear out the swarms of helicopters in this mission.
This isn't much of a concern with the starter AC's missile rack because it locks on very quickly, but the trick with missiles, whether attacking a single target or using multi-lock, is to watch the yellow quarter-circle gauge that appears next to enemies. It will fill up rapidly, and when it's full, a number appears next to that gauge. Then, you can fire off the missiles and be fairly certain that they will hit unless the enemy takes extreme evasive maneuvers. Firing missiles before that number appears is almost assuredly a waste of ammo.
Your third weapon on the starter AC is a pulse blade. This is essentially an energy sword that you can use to make melee attacks. The starter pulse blade can make two consecutive attacks, or you can charge it to inflict a single heavy blow; the latter is useful for quickly inflicting a lot of ACS stagger damage to an enemy. Note that when you go to make a blade attack, your AC will boost forward a short distance, but smarter enemies will simply boost backward to avoid you. That's why it's best used against larger and less mobile enemies.
After you get on the catapult and proceed down to the city, you're given three waypoints to investigate at your leisure. The city is packed full of "muscle tracers", or "MTs"—simpler, mass-produced mechs that don't have the mobility or firepower of an Armored Core. That doesn't mean that they're no threat, though.

You can tackle the waypoints in any order, but we recommend starting from the left.
In fact, some of the MTs in the first mission have four-lock missile racks just like yours, and if you let those missiles slam into you, they can inflict some pretty heavy damage. In later missions, these same MTs can carry grenade cannons or heavy machineguns, so don't get cocky. Using these MTs' attacks to practice your quickboosting (on the X button) is a pretty good idea, actually.
Upon checking the third of the three wrecked Armored Cores, your handler Walter will send up to a higher area to examine a fourth and final wreck. It is at this point that the game will save a checkpoint, and you'll very abruptly be in your first boss fight of the game against the HC Helicopter.
How To Down The HC Helicopter In Armored Core VI
If you've already tried to beat the HC Helicopter and gotten destroyed mercilessly over and over, don't feel too bad. Armored Core VI is sufficiently different from older games in the series that even franchise veterans were caught off-guard by this vicious assault chopper. In fact, only some 78% of players that have played the game were actually able to beat it.
The HC Helicopter's weakness is that it doesn't actually have very much AP. That means it's relatively fragile, but it might not seem that way if you've tried standing on the ground and plinking at it with your rifle. That's because it likes to hover just out of the optimal range for your rifle, and your shots begin to ricochet, dealing less than 20% of their full damage.

The "trick" to beating the HC Helicopter is to make use of the starter AC's pulse blade. That might sound ridiculous—using a sword against a helicopter? Indeed, that's what you need to do. The battle is intended to make you realize both that your Armored Core is not a big stompy robot like you might see in the Mechwarrior franchise, but in fact a high-flying death-dealing machine.
Here's what you need to know: the HC Helicopter has three pairs of weapons. First, it has two powerful machinegun pods that it will pepper you with almost constantly; these are damaging up close, but have poor range and aren't that strong at a distance. On the far outer sides of its assembly, it has two gigantic missile packs. These fire swarms of homing missiles not unlike your own; they're dangerous, but if you keep moving with your boosters and quickboosts, you should be able to avoid most of the danger.

The square red warning reticle marks an incoming heavy attack. Move!
To deal with the heavy rockets, what you'll want to do is exactly what Walter tells you to do: take to the air. However, the starter AC doesn't actually have great aerial boosting performance. You definitely can avoid most of the damage by simply holding the A button and flying upward, but you're also going to empty your energy gauge quickly that way, and it doesn't put you much closer to the HC Helicopter.
Instead, aim directly at the helicopter and click in the right stick to activate your assault boost. You'll dash directly at the chopper, and once you get in range, you can unleash both hits of your pulse sword to deal massive damage as well as a likely ACS Overload to the helicopter. From there, stay close while unloading your missiles and rifle as quickly as you can, and if the HC Helicopter doesn't recover and flee before your pulse blade cools off, hit it again.

Properly executed, this kind of maneuver can easily take a third to one-half of the HC Helicopter's AP away. From there, you'll likely be reloading both your gun and missile rack, as well as out of energy, so quickboost behind a building and take a couple of seconds to catch your breath, both literally and figuratively. Once you've recovered, the goal is basically the same: keep firing your rifle and missiles while you're in range for them to build up ACS stagger and inflict constant damage on the helicopter, and then assault boost up and slash it to pieces.
The key things to understand in this fight are that its rockets and to a lesser degree its missiles can absolutely devastate you if you don't stay on the move or take cover, and that your weapons have limited range, so you need to be up close to inflict any real damage. If you can execute the above strategy two or three times while avoiding the HC Helicopter's big attacks, you should have no problem trashing the chopper.

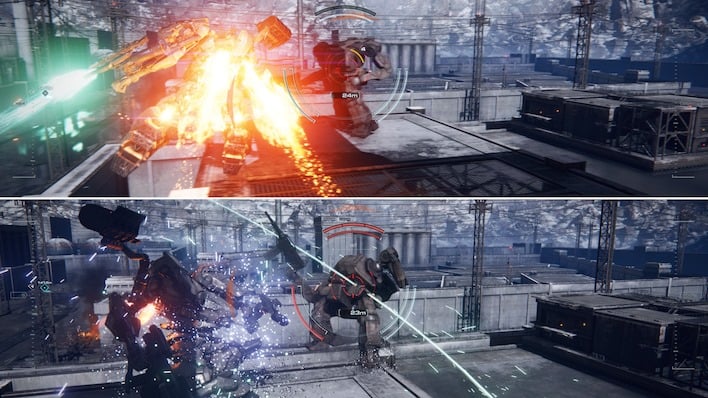
Of course, we have to be honest: the HC Helicopter is barely a challenge at all compared to later, more difficult bosses. In particular, the final boss of the first chapter of the game (pictured above) is probably harder than anything in any previous Armored Core game.
Don't be disheartened, though. Armored Core is a game about adjusting your tactics to suit the situation, and with a little practice and some understanding of the game's mechanics, we're confident that most gamers can get through the tough parts. Let us know if this guide was helpful for you, or if you'd like to see additional content on Armored Core VI.
