Logo   Banner   TopRight
TopUnder
Transparent
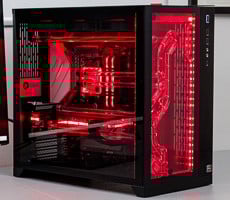
Shuttle SD31P Small Form Factor XPC
Transparent
Date: Aug 08, 2005
Section:Systems
Author: Robert Maloney
Transparent
Introduction

When we last checked in with Shuttle back in April, we took a look at their current entry for the Intel platform, which was based on the latest chipset at the time, the i925XE.  Our introduction for that piece went something along the lines of how the SFF market typically lags behind the full-sized board market, but how Shuttle was right on the cutting edge.  Well, it's been no more than 12 weeks since we wrote that article, and Shuttle is right back in the mix with the SD31P.  The SD31P utilizes the "P" chassis, so visually speaking it should look the same on the outside as their last few entries.  The FD31 motherboard, however, is based on the brand-new i945G chipset, which, along with a few other improvements, supports dual-core processors.

Now, let's take a step back.  We're looking at a system no larger than the average monitor or kitchen appliance that can run a dual-core CPU and supports high-end PCI-e graphics.  And it's only the third 945-based product we have received in the labs for testing.  So, Shuttle is not just keeping up with the other manufacturers - they are actually seem ahead of the game now.  A quick run-down of the other features of the SD31P include 24-bit on-board audio from none other than Creative Labs, dual channel DDR2 support at speeds up to 667MHz, as well as Extended Memory 64 Technology (EM64T) support for running 64-bit operating systems.  All signs point to the SD31P perhaps being the pinnacle of Shuttle's XPC line so far, so let's get right down to our review.

        
CLICK ANY IMAGE TO ENLARGE

Specifications of the Shuttle SD31P
Nothing lacking here...


Processor
·
_Intel LGA775 Pentium D

Memory
·
_Dual-channel DDR2 667/533
·
_2x DIMM slots (2GB max)

Motherboard
·
FD31 (proprietary)

Intel 945G + ICH7-R chipset
· 1066/800/533 MHz FSB
· 1 x1 PCI Express slot

· 1 x16 PCI Express slot
· Intel Graphics Media Accelerator 950

Audio
·
_8 channel audio
·
_Digital (SPDIF) audio ports
·
_Analog audio ports

Network
·
_Gigabit LAN

Storage
·
_4 Serial ATA 300 headers
·_RAID (0,1, 5, 10) with Intel Matrix Storage Technology
·
_(1) IDE header
·_(1) FDD header
·
_(1) 5.25" storage bay
·
_(3) 3.5" storage bays


Front-panel I/O
· 8-in-1 card reader

·_2x USB 2.0 ports
·
_FireWire 400 port
·
_Microphone port
·
_Headphone port
·
_Power button
·
_Reset button

Rear-panel I/O
·
_PS/2 Keyboard socket
·
_PS/2 Mouse socket
·
_4x USB 2.0 ports
·
_FireWire 400 port
· SATA hot plug port
·
_Gigabit LAN (RJ-45)
·
_8 channel audio out
·
_SPDIF I/O ports
·
_Coaxial Audio port
·_Clear CMOS button
·
_Serial port
·
_Optional Parallel port

Silent X (system cooling)
·
_Integrated Cooling Engine (ICE)
·
_Intelligently-engineered airflow mechanics

Power Supply
·
_Silent X 350W

Dimensions (L x W x H, mm)
·
_325 x 220 x 210

Weight (net / gross; kg, lbs)
·
_4.25 (9.35) / 6.05 (13.31)


The Bundle:

Shuttle, like many other chassis manufacturers, has turned away from the "tighten screw here" mindset that most DIY builders are familiar with.  Most, if not all, installation options in their 'P' Chassis line consist of toolless techniques, such as snap-on rails
.  This allows for quicker and easier system setup (and breakdown for that matter).  A single IDE hard drive, or floppy drive, can be added to a vacant bay by popping on two rail edges alongside the drive, and then sliding the rails until they click into the frame.  The same technique is used to mount an optical drive into the 5 1/4 inch bay.  Adding SATA drives is an even easier task; simply place the drive(s) between mounting brackets along the top of the unit, and click down on the edges. 

Most of the cables are pre-routed to the most efficient areas for installation.  As such, the bundle appears light since only a few extras are needed.  These consist of a floppy cable with power cable splitter, and a short extra SATA cable.  We noticed that the drive shields from the SB95P have been done away with, a move we applaud since these shields had a knack for coming loose and bouncing about the chassis.  Final inclusions to the bundle were a small tube of thermal paste for the CPU/ICE heatsink and two feet to prop up the unit.  There were also the various user's manuals and driver media that one needs in order to install or troubleshoot their setup, including drivers for both 32-bit and 64-bit OSes.


Transparent
Closer Inspection of the SD31P


Inspection and Comparison of the SD31P
Sometimes no change is still just as good


There's really no major changes in the outward appearance of the 'P' chassis that Shuttle uses with both the SB95P we reviewed earlier, and the SD31P.  The front panels are a shade darker, perhaps now more like true gunmetal than the lighter grey we saw before.  It's a subtle touch, and it definitely looks better in its current incarnation.  The outer shell retains the same black finished aluminum, with vents placed along the right and left sides, in line with the CPU and ICE cooling system.

The SD31P has two external drive bays, one each for 3.5" and 5.25" size drives, and a front I/O panel concealed along the bottom behind a retractable face plate.   The I/O panel has two audio jacks as well as two USB ports and a FireWire port for easier connectivity.  Additionally, there's a slim-line 8-in-1 card reader at the top, capable of reading all popular formats.  The rear of the chassis is a mixture of fan grills and ports.  Reflecting on the fact that there isn't as much room as one would find in a full-sized tower, it's amazing that the rear doesn't appear to be as cluttered as it could be.  Two slots are placed along the left side for the PCI-e graphics and another add-in card.  The center of the unit is dominated by two upper zone fans and a larger fan that comes as part of the 350W PSU.  Down below are the full assortment of ports, including a 15-pin VGA port to support the on-board graphics, 4 USB 2.0 ports (up from 2 ports on the SB95P) and a SATA hot-plug.  Not to be undone, off to the right of the fans is an additional FireWire connection, which they couldn't fit on the I/O plate.   We also completely missed the 'Clear CMOS' button upon our original inspection; placed, yet unlabeled in the upper left corner.  Shuttle assures us this will be clearly marked on production models.


The Integrated Cooling Engine (ICE) module appears to be the same unit that we had taken a look at earlier.  The ICE module uses convection cooling to transfer heat quickly away from the CPU.  Four tall copper heatpipes are plated in nickel, and are surrounded by radiator fins.  There are two fans on either side of the heatsink, with one side pulling in cooler air from outside the chassis and a larger, quieter 92mm fan exhausting the air out the other side.  The fans can be controlled via the BIOS allowing for various speeds depending on the user's performance/noise desires.  Power for the SD31P is supplied by a 350W SilentX PSU, providing 100W more than the typical small form factor PSU.  One new addition that's sure to be appreciated by power users is the inclusion of a PCI-Express power connector coming off of the PSU.  


In our last foray in the building of the Shuttle SB95P, we had a few problems with their toolless drive installation that we hoped would be corrected.   We commented on three issues: what seemed to be weak retention brackets, a 4-pin hard drive locking mechanism and some "radiation" shields that did nothing more than come loose and bang around the inside of the chassis.  Well, we can say for certain that Shuttle may be one of the few manufacturers that definitely takes analyst's and owner's comments to heart, as all three of these issues have been resolved.  When the cover was removed from the SD31P. we saw that the drive tray was held down tightly by the SATA hard drive clips.  These rails have small indents that rest within the frame as before, but the ends fit into specifically placed slots and then clips are locked down assuring a tight connection.

Once the clips are removed, the tray can be removed in order to install the floppy drive or IDE hard drive, and an optical drive.  The four pin/retention scheme has been removed entirely.  Rather than simply resting the hard drive onto the pins, side rails are clipped onto the drive, which are then slid into the channels on the frame and locked into place.  The same basic procedure is followed for an optional floppy drive and the CD or DVD-ROM.  It takes a little force to get the drives to slide back all of the way, but once there they were solidly locked in.  Also completely gone were the shields we disapproved of in our SB95P review.

Transparent
BIOS options and overclocking results


Examining the BIOS of the SD31P
The "setup" for our setup


As with just about everything else with the Shuttle SD31P, the BIOS appeared to be a slightly updated version of the Phoenix / AWARD variety we've used before.  There are many options that come standard on the FD31 motherboard, so running through the screens can take some time to ensure that everything is set up correctly.  The ICH7-R southbridge natively supports SATA and IDE hard drives, and can also be used to configure RAID matrices, in 0, 1, 5, and even 10 modes.  In total, the SD31P could have an IDE hard drive and two SATA drives, or even three SATA drives installed and running in whatever configuration suits your needs best.

The fans can also be configured for high speeds or low noise.  Those bent on overclocking their system to the max should probably steer more towards the mid to full fan speeds, but the noise output will definitely be noticeable.  We could relate the sound to a hair dryer when set to the Full Fan Speed mode.  But, if high-end gaming is not a main concern, choosing Ultra-Low Speeds, or even the Smart Fan mode, is the better choice, with nearly quiet operation being the end result.  Another small addition, which some users might find handy, is the ability to control the brightness of the LED around the power switch.  Some might find the bright blue light to be a distraction, so Shuttle has provided percentages from 100% all the way down to 0%, thereby shutting the light off altogether.  

Overclocking Tools
When fast is not fast enough


The SD31P has a rudimentary set of tools for overclocking the unit.  First off, we disabled Spread Spectrum modulation, as keeping this enabled could cause some instability when raising front side bus speeds.  The CPU clock speeds fall within a range of 100MHz and 355MHz, and a full range of voltage options, both higher and lower than the default 1.325V.  As the 945 and 955 series of boards come with support for higher memory frequencies, we found that the FD31 offered options for automatically detecting the frequency via SPD on the memory, or manually choosing 400MHz, 533MHz, or the new 667MHz standard.  The Corsair DDR2 we tested with required us to raise the voltage from a default value of 1.9V to 2.1V, but this was as high as we could go, which could stop us from getting too far without relaxing the memory timings to a degree.  Again, as with the SB95P, there weren't any options to set the PCI-e clock to a defined speed either.  There's just enough here to get a decent overclock, and usually that's all we can expect for in a SFF PC.  


CPU-Z Overclocked results


SANDRA2005 Benchmark


Based on previous attempts with other 945 boards, we knew that there was some potential for getting high gains with the Pentium D 820.  As such, we immediately set our sights for the 240s, but found that we could not get the system to reboot, nor could we get back into the BIOS.  Not being able to find the Clear CMOS button on the outside of the chassis came back to bite us here.  Instead, we found ourselves manually resetting the BIOS a few times until we found the right combination of settings that worked.  By leaving the Corsair memory at SPD timings, and the frequency set to AUTO, we were able to reach a high-point of 240MHz for the FSB.  Benchmarks, however, took a turn for the worst, as the CPU throttled down, possibly due to some high temperatures that the ICE module was not prepared to fully handle.  Performance was actually less than half that found at stock speeds, and raising voltage as high as 1.5V on the CPU didn't help stablize things any.  If anything, it just increased temperatures higher, so we decided on cutting back some.

Through a torturous process of dropping speed, testing, dropping voltage, retesting, and so on, we found that the sweet spot for our foray into overclocking the SD31P came at a 224MHz front side bus.  CPU VCore was set at 1.375V (reported as 1.325V in CPU-Z) with the memory set at a 3:4 divider, thus running at approximately 321MHz.  Obviously this was not as high as the 255MHz FSB that we were able to obtain earlier, but we still considered this a success, equalling about a 12% jump in speed.  Our CPU - Arithmetic score in SANDRA jumped up about 1600 points, which is about a 10-11% increase in performance.  During all of this testing, however, we kept fan speeds to the maximum levels possible, which might not always be the most desirable setting for those seeking quiet, peaceful operation. 


Transparent
Testing Setup and SANDRA comparisons


How we configured our test systems: When configuring the test systems for this review, we first entered the system BIOS and set each board to their "Optimized" or "High-Performance Defaults".  The hard drive was then formatted, and Windows XP Professional with Service Pack 2 was installed. When the installation was complete, we hit the Windows Update site and downloaded all of the available updates, with the exception of the ones related to Windows Messenger. Then we installed all of the necessary drivers, and removed Windows Messenger from the system altogether. Auto-Updating and System Restore were also disabled, and we setup a 1536MB permanent page file on the same partition as the Windows installation. Lastly, we set Windows XP's Visual Effects to "best performance", installed all of our benchmarking software, defragged the hard drives and ran all of the tests.

Test System Specifications
All Intel All The Time
SYSTEM 1:

Shuttle SD31P


Intel 945G Chipset
Intel Pentium D 820 2.8GHz CPU
2x512MB Corsair XMS2 DDR2

ASUS Extreme AX800XL
On-Board 10/100/1000 Ethernet
On-Board Audio

120GB Seagate Barracuda
7,200 RPM SATA Hard Drive

Windows XP Pro SP2

Intel INF 7.21.1003
ATi Catalyst 5.7 Drivers
DirectX 9.0c
SYSTEM 2:

Gigabyte 8I945P-G


Intel 945P Chipset
Intel Pentium D 820 2.8GHz CPU
2x512MB Corsair XMS2 DDR2

ASUS Extreme AX800XL
On-Board 10/100/1000 Ethernet
On-Board Audio

120GB Seagate Barracuda
7,200 RPM SATA Hard Drive

Windows XP Pro SP2

Intel INF 7.21.1003
ATi Catalyst 5.7 Drivers
DirectX 9.0c
Preliminary Benchmarks With SiSoft SANDRA 2005
Synthetic Testing Starts with SANDRA

We began our testing with SiSoftware's SANDRA, the System ANalyzer, Diagnostic and Reporting Assistant. SANDRA consists of a set of information and diagnostic utilities that can provide a host of useful information about your hardware and operating system. We ran three of the built-in sub-system tests (CPU Arithmetic, CPU Multimedia, and Memory Bandwidth) that partially comprise the SANDRA 2005 suite of benchmarks.  All of these tests were run with the Shuttle SD31P powered by a Dual Core Intel Pentium D 820 at 2.8GHz CPU with 1GB of Corsair XMS2 DDR2 memory which we compared against similar kinds of systems from SANDRA's database.


SANDRA CPU Arithmetic Benchmark
Pentium 4D 820 @ 2.8GHz
1024MB Corsair DDR2 (CL3)


SANDRA CPU Multimedia Benchmark
Pentium 4D 820 @ 2.8GHz
1024MB Corsair DDR2 (CL3)


SANDRA Memory Benchmark
Pentium 4D 820 @ 2.8GHz
1024MB Corsair DDR2 (CL3)

In both CPU and Memory performance, the SD31P produced scores in SANDRA that were quite similar to what was contained in SANDRA's database.  The CPU performance was slightly off for the Arithmetic module, and then slightly better in Multimedia.  The memory bandwidth scores were also slightly down from SANDRA's list, even when using Corsair DDR2 at CL3 ratings versus unknown RAM at CL5 in SANDRA.  The bandwidth we achieved was second lowest on the list of representative systems, only beating out the older i865PE. 

Transparent
PCMark05 Comparisons

Futuremark's PCMark05
http://www.futuremark.com/

For our next round of synthetic benchmarks, we ran the CPU and Memory performance modules built into Futuremark's brand new PCMark05.   We just recently began working with PCMark 05 and have found it to be even more robust in terms of test features than its predecessor.  That said, the CPU and Memory test modules we use for comparison are very similar to the '04 version of the test suite.  For those interested in more than just the graphs, we've got a couple of quotes directly from Futuremark that explain exactly what these tests do, and how they work:

"The CPU test suite is a collection of tests that are run to isolate the performance of the CPU. The CPU Test Suite also includes multithreading: two of the test scenarios are run multithreaded; the other including two simultaneous tests and the other running four tests simultaneously. The remaining six tests are run single threaded. Operations include, File Compression/Decompression, Encryption/Decryption, Image Decompression, and Audio Compression" - Courtesy FutureMark Corp.

The PCMark05 CPU benching results were right on par with each other;  there's a scant difference of only six points that separate the two systems.  The SD31P may be small in stature, but it will put up numbers that keep performance on the same level as the "big boys".


"The Memory test suite is a collection of tests that isolate the performance of the memory subsystem. The memory subsystem consists of various devices on the PC. This includes the main memory, the CPU internal cache (known as the L1 cache) and the external cache (known as the L2 cache). As it is difficult to find applications that only stress the memory, we explicitly developed a set of tests geared for this purpose. The tests are written in C++ and assembly. They include: Reading data blocks from memory, Writing data blocks to memory performing copy operations on data blocks, random access to data items and latency testing."  - Courtesy FutureMark Corp.

The memory performance results were also close, as the SD31P managed to slip past the Gigabyte 8I945P-G by nine points.  These performance deltas are minimal enough that we can't realistically declare a winner.  While we used to compromise space for performance in the past with Shuttle's XPC line, it appears that line of thinking is now a thing of the past.


Transparent
World Bench 5 - Photoshop 7 & Office XP

PC World's World Bench 5.0: Photoshop 7 & Office XP Modules
http://www.pcworld.com/pcwtools/worldbench.asp

PC World Magazine's WorldBench 5.0 is a new breed of Business and Professional application benchmark, poised to replace the aging and no-longer supported Content Creation and Business Winstone tests. WorldBench 5.0 consists of a number of performance modules that each utilize one, or a group of, popular applications to gauge performance.  Below we have the results from WB 5's Photoshop 7 and Office XP SP2 modules, recorded in seconds.  Lower times indicate better performance.


Similar to the results that we found with SANDRA, application performance was on par in the WorldBench 5.0 benchmarks as well.  The Photoshop 7 module ran slightly quicker on the Gigabyte board, averaging about 5 seconds quicker than the Shuttle SD31P.  The Office XP testing was spot-on, however, with both systems finishing the tests in eaxactly the same amount of time.

Transparent
Encoding Tests: LAMEMP3 and Windows Media Encoder 9


Windows Media Encoder 9
Digital Video Encoding

We continued testing the dual core Pentium D 820 with another module from World Bench 5, this time based on Windows Media Encoder 9.  PC WorldBench 5's Windows Media Encoding test reports encoding times in seconds, and like the tests on the previous page, lower times indicate better performance here.

In the third World Bench 5 module, we found that not much had changed from the previous two results.  Both systems are running neck and neck, with the Gigabyte board finishing just two seconds quicker on the average. 

LAME MP3 Encoding Tests
Breaking the Sound Barrier

In our custom Lame MP3 encoding tests, we convert a large WAV file to the MP3 format, which is a very popular scenario that many end users work with on a regular basis, to provide portability and storage of their digital audio content.  In this test, we chose a large 223MB WAV file (a never-ending Grateful Dead jam) and converted it to the MP3 format.  Processing times are recorded below.  Once again, shorter times equate to better performance.

Only a single second separated the two systems, with the fastest time overall going to Shuttle SD31P.  Like we saw with the World Bench 5 testing, the variance between the full-sized Gigabyte 8I945P-G and the SFF Shuttle SD31P is so slight that any differences in real-world usage would be hard to notice.


Transparent
Kribibench Benchmarks

Kribibench v1.1
Details: www.adeptdevelopment.com

Next up, we ran Kribibench, a 3D rendering benchmark produced by the folks at Adept Development.  Kribibench is an SSE aware software renderer.  A 3D model is rendered and animated by the host CPU, and the average frame rate is reported.  We used two of the included models with this benchmark: a "Sponge Explode" model consisting of over 19.2 million polygons and a gargantuan "Ultra" model that is comprised of over 16 billion polys...


The current trend continued with the two Kribibench models.  Both systems are running at similar performance levels.  If a leader must be declared, we would have to give that title to the Gigabyte 8I945P-G, which finished just fractions of a frame per second faster than the SD31P.  Again, these benchmark differences are completely negligible, and well within standard testing method allowances.

Transparent
Cinebench 2003 and 3DMark05

Cinebench 2003 Performance Tests
3D Modeling & Rendering Tests

The Cinebench 2003 benchmark is an OpenGL 3D rendering performance test, based on the commercially available Cinema 4D application.  This is a multi-threaded, multi-processor aware benchmark that renders a single 3D scene and tracks the length of the entire process. The time it took each test system to render the entire scene is represented in the graph below (listed in seconds). 

We hate to bore you to death with the lack of details, but once again the graphs don't have much to say. We're looking at two systems that are really equals, regardless of their size.  We might have expected for the Shuttle XPC to drop off at some point, but so far, so good.

Futuremark 3DMark05 - CPU Test
Simulated DirectX Gaming Performance

3DMark05's built-in CPU test is a multi-threaded "gaming related" DirectX metric that's useful for comparing relative performance between similarly equipped systems.  This test consists of two different 3D scenes that are generated with a software renderer, which is dependant on the host CPU's performance.  This means that the calculations normally reserved for your 3D accelerator are instead sent to the central processor.  The number of frames generated per second in each test is used to determine the final score.


Finally, a bit of a performance delta, but skewed in Shuttle's favor.  The SD31P outperformed the Gigabyte 8I945P-G by 80 points, equalling a 1.5% increase in 3D rendering.  We'll hold off any celebrations until we see some real-world gaming results, that can be found on the next page.

Transparent
Unreal Tournament 2004 & Doom 3

Unreal Tournament 2004
DirectX 8 Gaming Performance

To start our in-game testing, we did some low-resolution benchmarking with Unreal Tournament 2004.  When testing with UT 2004, we use a specific set of game engine initialization settings that ensure all of the systems are being benchmarked with the exact same in-game settings and graphical options.  Like the other in-game tests in this review, we used a "Low-Quality" graphical settings and low screen resolution which isolates CPU and memory performance.

The initial feeling that there might be some kind of boost graphically faded quickly, as our Unreal Tournament 2004 testing came out to a stalemate.  Only 0.07 frames per second separate the two boards, with the SD31P the one to fall behind this time.

Benchmarks with Doom 3
OpenGL Gaming Performance

For our next game test, we benchmarked all of the test systems using a custom multi-player Doom 3 timedemo. We cranked the resolution down to 640 x 480, and configured the game to run at its "Low-Quality" graphics setting. Although Doom 3 typically taxes today's high-end GPUs, when it's configured at these minimal settings it too is more CPU and memory-bound than anything else.


Doom 3 also had the Shuttle SD31P in second place, now a full two fps behind the 8I945P-G.  So, we've run full course - ahead in 3DMark05, equal in Unreal Tournament 2004, and now falling behind in Doom 3.  The performance delta, fittingly enough, now had the SD31P trailing the Gigabyte board by 1.5%.


Transparent
Performance Analysis and our Rating


System Performance Analysis: The Shuttle SD31P matched the full-sized Gigabyte 8I945P-G in every benchmark, with barely a few seconds or points separating the two systems.  As with their other 'P' series models, the SD31P comes with a 350W PSU and PCI-e graphics, giving this SFF PC all of the power and capabilities of systems 2-3 times its size.

We were very impressed with the SD31P.  As we mentioned in the earlier, it seems Shuttle is no longer content with hanging back, producing units that are slightly behind the technology curve.  By releasing the SD31P at the same time that other manufacturers are coming out with their full-sized i945 boards, it makes the buyer's choices and options much more open.  There's no reason to "settle" anymore.  If you're looking for high-end performance, then Shuttle has what you are looking for, just in a smaller package.

We were also pleasantly surprised to find that all of our gripes over the earlier 'P' chassis-based SB95P have been corrected.  The drives and drive cage are all locked down tightly now, which we feel is very important for any system that's expected to be carried around often, a la the typical LAN party.  Adding in new options such as a PCI-e power connector and improving the routing of the cabling only serves to further increase our good feelings about the SD31P.  The only negative aspect was the price, currently a hefty $450, and the unmarked Clear CMOS button from the back panel, as that could have saved us countless times during overclocking the unit.  The button issue will be corrected for retail, but some might still find the price to be a bit high for their tastes. 

We've said it before, and it's worth repeating once again: when it comes to innovation, few SFF manufacturers can stand up to what Shuttle has been doing these days.  The SD31P is a tour-de-force in its product class, with performance on-par with "full-sized" counterparts, multiple setup options, and just plain good looks.  We're giving the Shuttle SD31P XPC a 9.5 on the Heat Meter and an Editor's Choice award.  This is our favorite Intel based SFF PC yet.

_Cutting edge technology in a SFF PC
_Supports Dual-Core CPUs
_Runs nearly silent in Smart Fan Mode
_Classic styling
_Expect to shell out for this one - ~$450
_The 'Clear CMOS ' button needs labeling
_Heat buildup could be issue when OC'ing

Looking for advice on hardware and nowhere to turn to?
Get into the HotHardware.com PC Hardware Forum!


Content Property of HotHardware.com