HOT Raspberry Pi DIY Mini Desktop PC Build
Introduction and Project Scope
We recently set out to design a mini desktop computer with the wildly popular Raspberry Pi single board computer. The Raspberry Pi is a Linux-driven, ARM processor-based micro computer that is known for its low cost and small size. People use the device for a variety of projects, from micro-servers to low cost media players. Basically, our goal was to turn what is currently one of the cheapest bare-bones computer boards into a fully enclosed mini desktop computer that could be taken anywhere without the need for cabling or setup. One of the high level goals of this project was also to learn about programming with Linux and get a good feel for it with the Debian distribution.
Update 11/28/2015: Earlier this week, RaspberryPi.org announced availability of the Raspberry Pi Zero. If you're considering a build like the one we take you through here on the following pages, you really should check this new model out. It essentially has the same specs as Raspberry Pi model B but with a faster Broadcom chip, an SD card slot and micro USB ports. The only caveate is that it doesn't have an Ethernet port and anolog audio and video ports. However, since it has mini HDMI output, that audio/video IO is consolidated over a single cable and port. Great stuff!

Raspberry Pi Model B Rev 2.0 with 512MB of RAM and 10/100 Ethernet
The Raspberry Pi desktop was an easy project to imagine, but keeping cost to a minimum and educating ourselves on the technology ended up being more time consuming than we initially projected. Here's a quick list of components we used for our build.

Our choice of plastic enclosure, or "project box"
After a successful load of the Operating System (OS) we plugged in our settings and used the code “StartX” to run the desktop interface. A standard computer monitor was suitable for working out all of the bugs on the big screen. After we were sure we had our OS running properly, we started to work on making it a portable system.
Update 11/28/2015: Earlier this week, RaspberryPi.org announced availability of the Raspberry Pi Zero. If you're considering a build like the one we take you through here on the following pages, you really should check this new model out. It essentially has the same specs as Raspberry Pi model B but with a faster Broadcom chip, an SD card slot and micro USB ports. The only caveate is that it doesn't have an Ethernet port and anolog audio and video ports. However, since it has mini HDMI output, that audio/video IO is consolidated over a single cable and port. Great stuff!
Raspberry Pi Model B Rev 2.0 with 512MB of RAM and 10/100 Ethernet
The Raspberry Pi desktop was an easy project to imagine, but keeping cost to a minimum and educating ourselves on the technology ended up being more time consuming than we initially projected. Here's a quick list of components we used for our build.
Supply List:
- Raspberry Pi Model B Rev 2
- 7-inch TFT LCD Display
- Plastic enclosure
- Cooler Master Choiix Power Fort 5V 1A Battery Pack – (Thanks Gigabyte!)
- AC Adapter Power Supply (10V, 1.45A matched for the monitor's requirements)
- Misc. Components, Cabling and Zip Ties
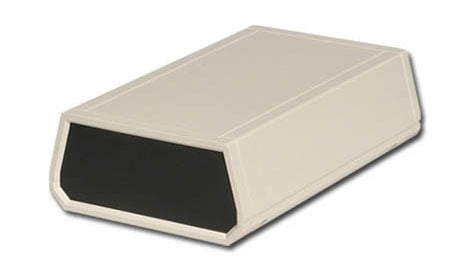
Our choice of plastic enclosure, or "project box"
After a successful load of the Operating System (OS) we plugged in our settings and used the code “StartX” to run the desktop interface. A standard computer monitor was suitable for working out all of the bugs on the big screen. After we were sure we had our OS running properly, we started to work on making it a portable system.
;)
Step one was to use a high speed milling bit to cut ports in the plastic side walls of the enclosure, so that we could have access to the Raspberry Pi's USB, Ethernet and power ports.
The ports are placed up flush against the sidewall
The enclosure we picked was a four piece enclosure that has removable sides. This gave us the ability to remove each panel and mill in our ports, making the job a whole lot easier. Once that was done, we used a hot glue gun to seal off around the ports, create a tighter fit and get rid of the gaps between the ports themselves and the side of the enclosure.
;)
The ports are placed up flush against the sidewall
The enclosure we picked was a four piece enclosure that has removable sides. This gave us the ability to remove each panel and mill in our ports, making the job a whole lot easier. Once that was done, we used a hot glue gun to seal off around the ports, create a tighter fit and get rid of the gaps between the ports themselves and the side of the enclosure.