Epox 5LWA+ i925XE Motherboard
Board Layout and Inspection

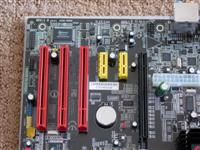
Epox has taken a departure from the norm with the color scheme used on the 5LWA+. Rather than stick with the dark green used in almost all of their previous motherboards, the PCB used for this board is a dull black. The colors used for other components vary from a deep red used on the PCI and SATA ports as well as for one set of DIMM slots to a vibrant yellow for the PCI-e 1x and IDE slots. It helps builders quickly distinguish the various components available to them and adds some flair for those who intend to use windowed cases. Two black-painted heatsinks are placed over the North and South bridges, both of which are passively cooled. From an aesthetic standpoint, the layout of the board appears to be free of clutter and follows standard placement of components.
|
Immediately noticeable when opening up the static bag for the first time is the cutout placed over the CPU socket, which is promoting the Piston V - a 5 phase switching power scheme. According the Epox, the Piston V offers strong and stable power while producing less heat than conventional designs. Heat issues are nothing new to Prescott CPUs, so any attempt by a manufacturer to keep the VRM cooler is much appreciated. On the periphery of the Piston V are 6 large capacitors, a few of which are placed close enough to the CPU sockets to cause a little concern when installing larger heatsinks. The upper right corner was especially tight, with little room available for locking down the retention clips on our stock Intel cooler. Hindering things even further was the placement of the 4-pin ATX connector, but those with 24-pin plugs can skip this problem altogether by using the centrally placed 24-pin ATX power connection instead.
As newer chipsets, and thus newer boards, are released, we've got the shift to SATA going in full-swing. In the lower left corner were four red SATA ports placed side-by-side, which are controlled by the nearby ICH6R Southbridge. Directly beneath these were the single yellow IDE port and a floppy port as well. The board schematic shows where a second IDE port could have been placed, but was left off. Instead, users can make use of the included SP-ATA converter (included in the package) which will allow PATA devices to be used on SATA connections. It's one way to keep older drives as part of an upgrade option, but with SATA hard drives and optical drives becoming more and more commonplace, it might be better to make the switch complete.
As we mentioned, installation and setup of the Epox 5LWA+ was made easier by color coding, which didn't stop with the ports. While connection of the front panel wires used to take a little guesswork, the 5LWA+ has each set of pins set to a different color with crosses for the positive leads. When everything has been installed, all wires checked, and the system ready to boot, there are a few items placed on the board that allow for quick and easy troubleshooting. Typical of many Epox motherboards, there is a LED readout down in the lower left that gives status codes during boot. If an error is detected in the boot process, the code shown can quickly give the user the source of the problem. Also helpful for setting up or troubleshooting a system who were two small buttons, one for resetting and the other for powering up the system, which are placed right on the edge of the board. The options available on the Epox 5LWA+ seem to cater well to both the new builder as well as the seasoned veteran.


